Installation Guide and Setup
Get started with Planneriffic in just a few minutes.
Download and Install
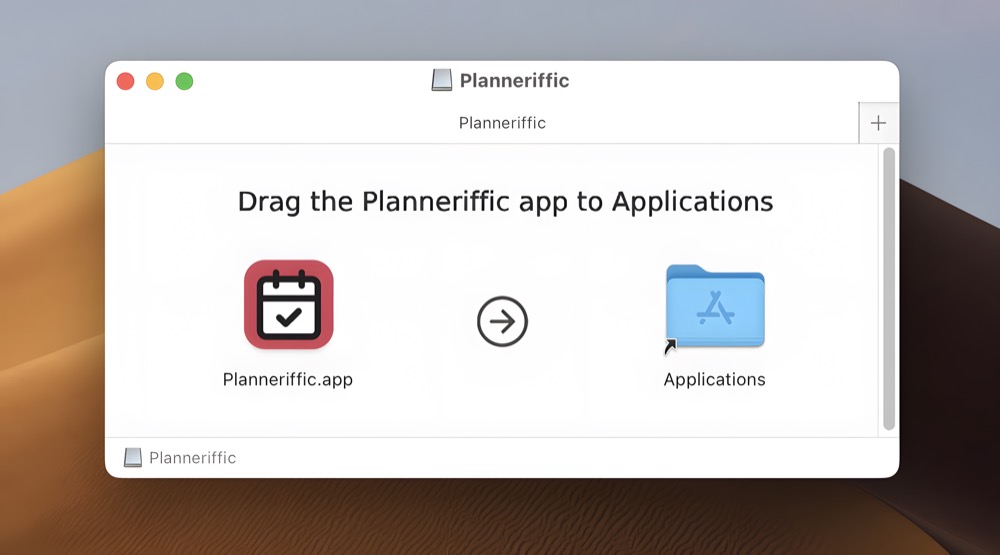
MacOS
Open the .dmg file, drag Planneriffic to your Applications folder, and launch.
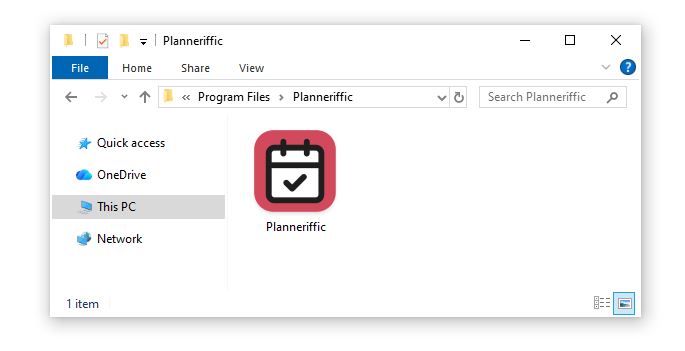
Windows
Place the .exe file in a permanent folder (like Program Files) and launch.
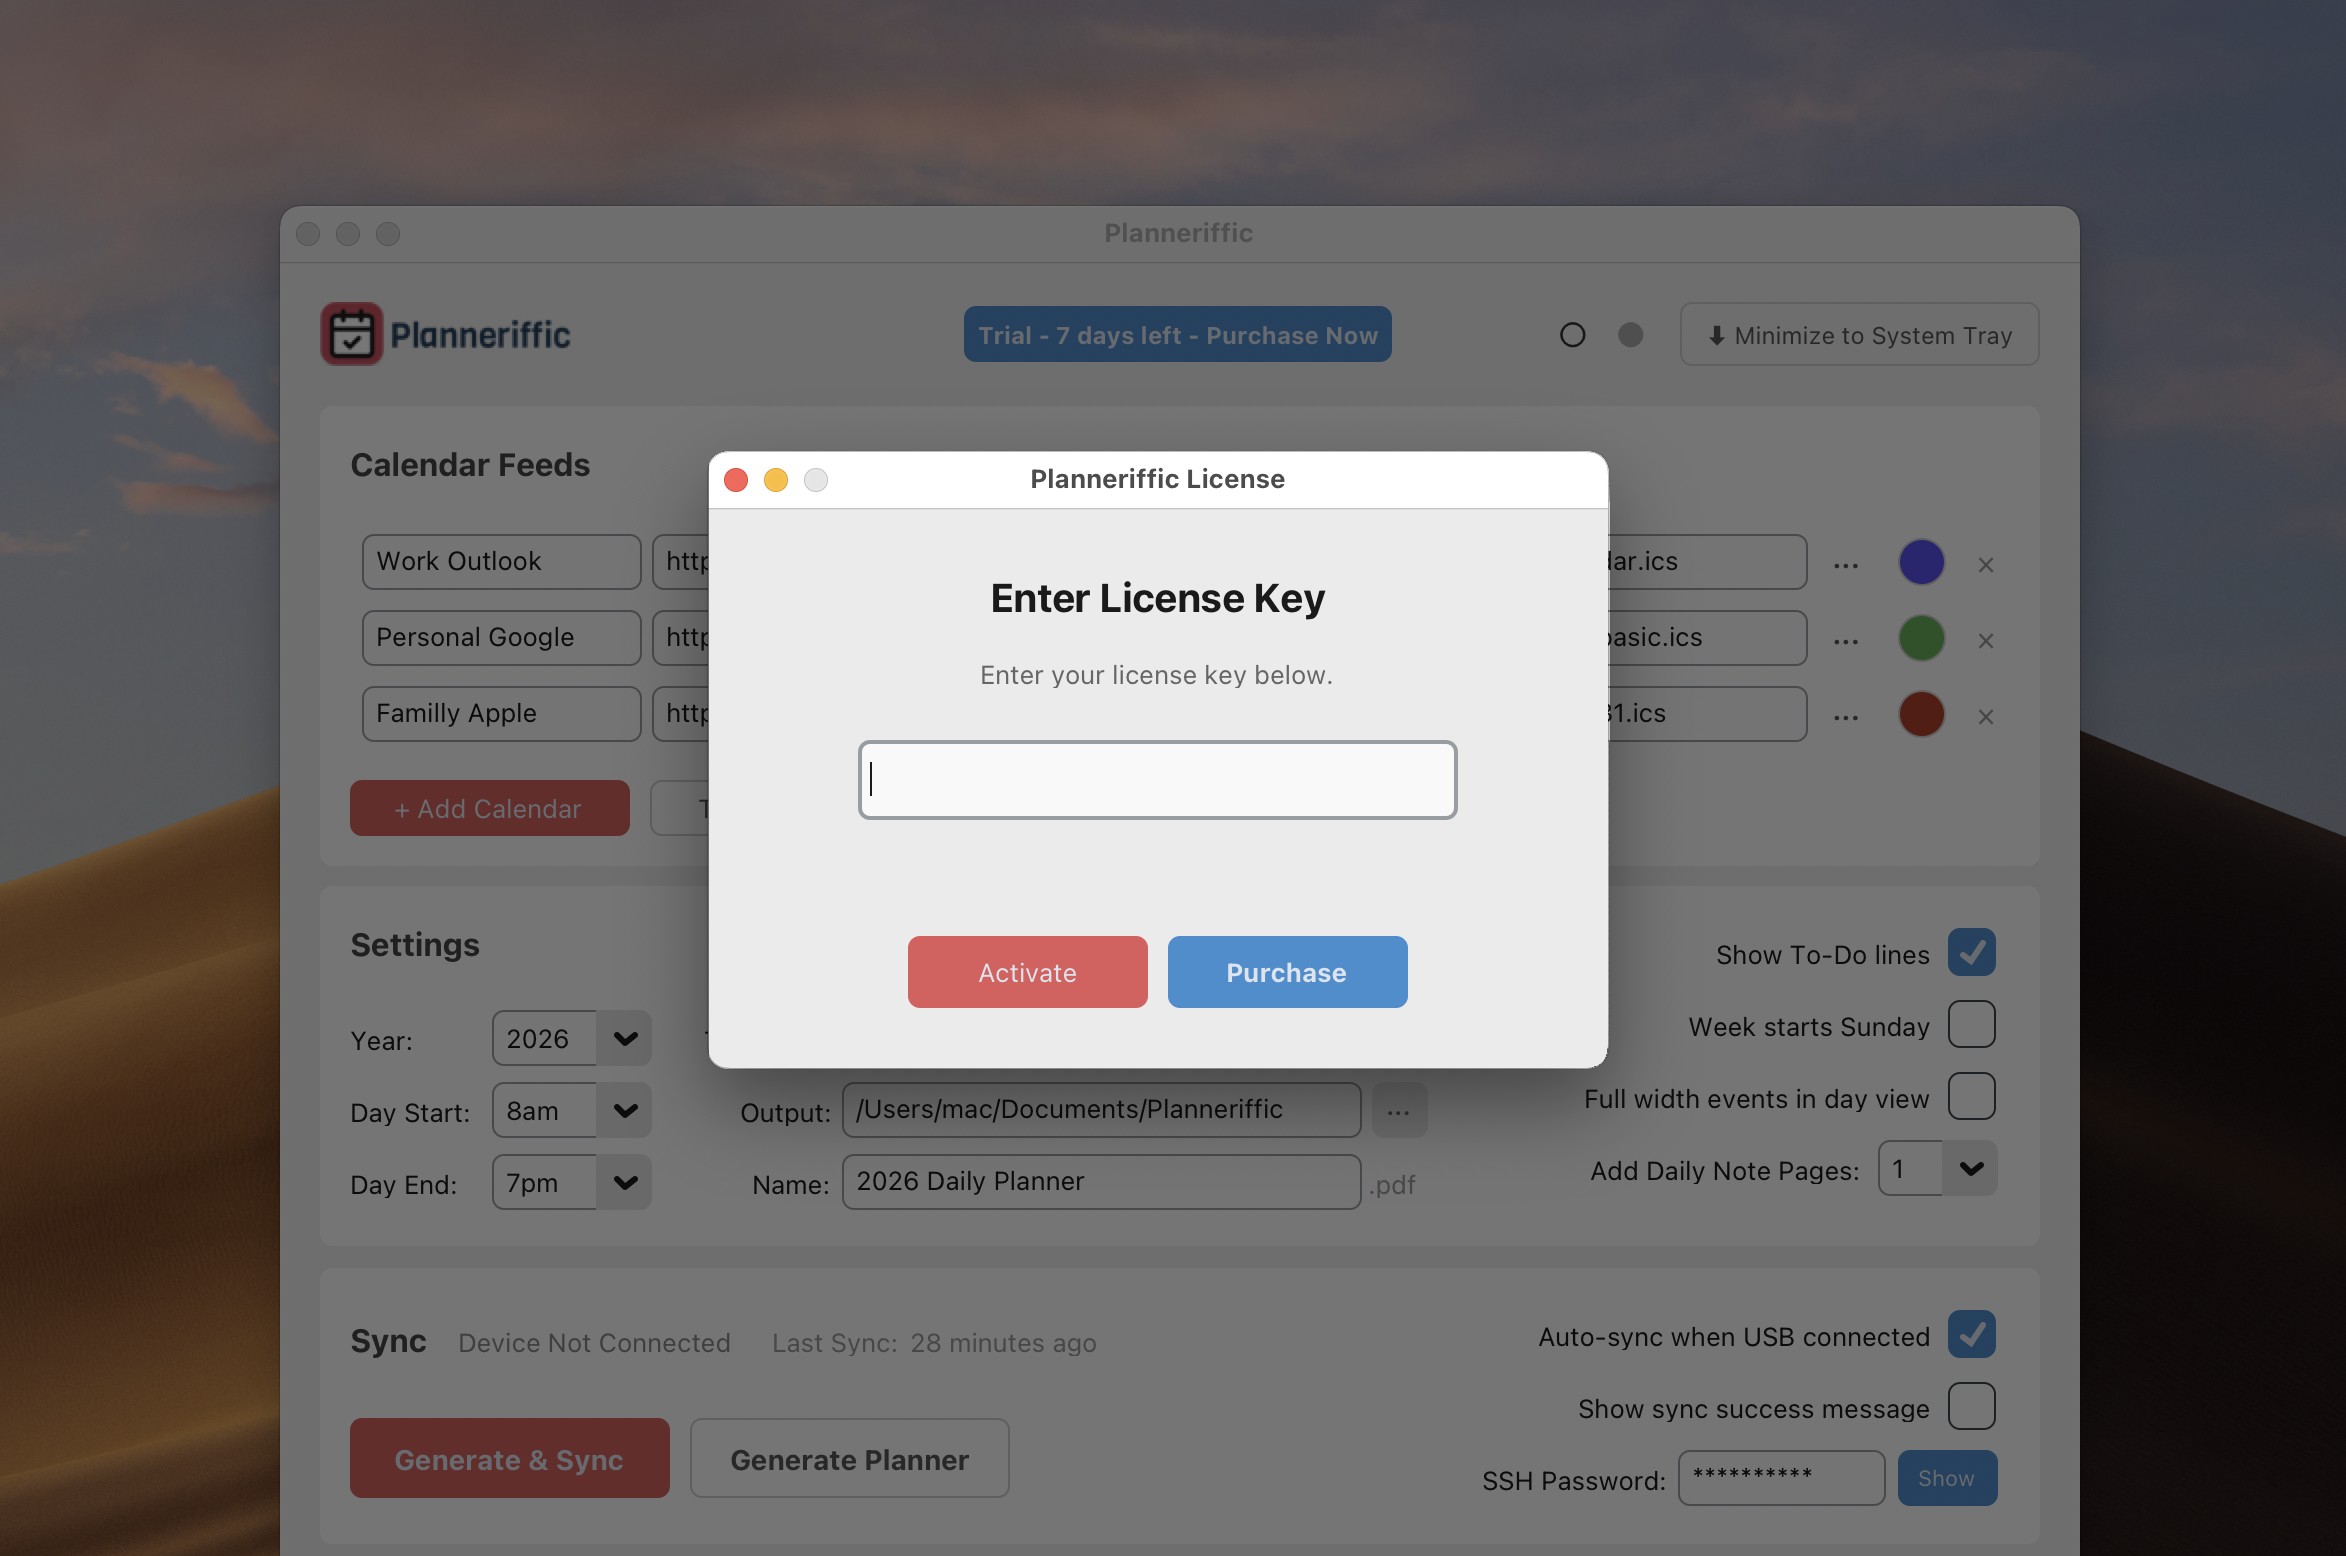
Enter Your License Key
After purchasing, you'll receive a license key by email. To activate Planneriffic, click the Trial button in the app, enter your license key in the popup, and click Activate.
Add Your Calendars
Import from multiple calendar sources — they'll all be merged into one planner.
Google Calendar
- Open Google Calendar in your browser
- Click the three dots next to the calendar you want to import
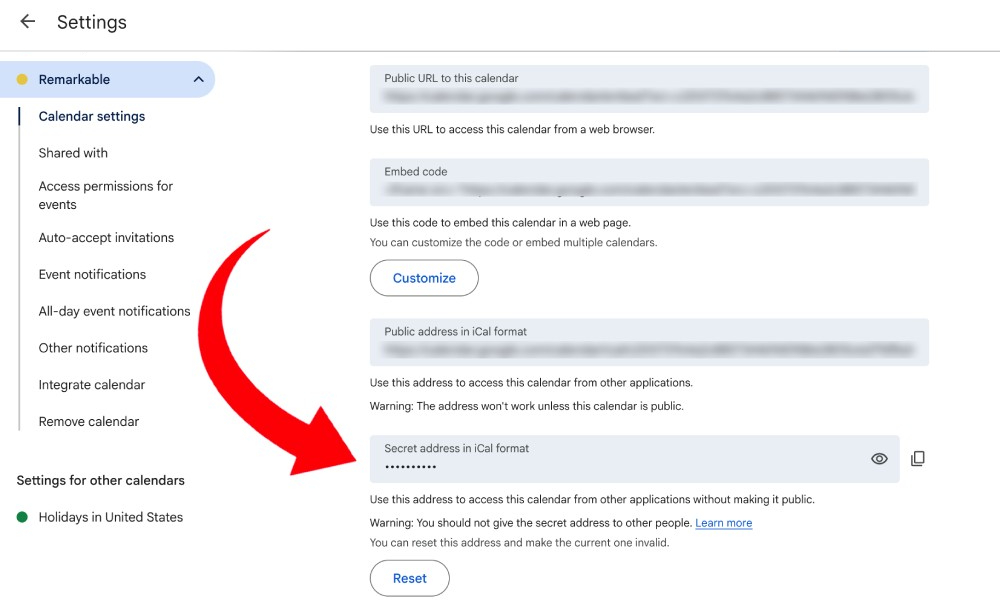
- Select Settings and sharing
- Scroll down to Integrate calendar
- Copy the Secret address in iCal format URL
- Paste the URL into Planneriffic, give it a name and choose a color
Note: Use the "Secret address" URL, not the public one, to keep your private events private.
Outlook Calendar
- Sign in to Outlook.com
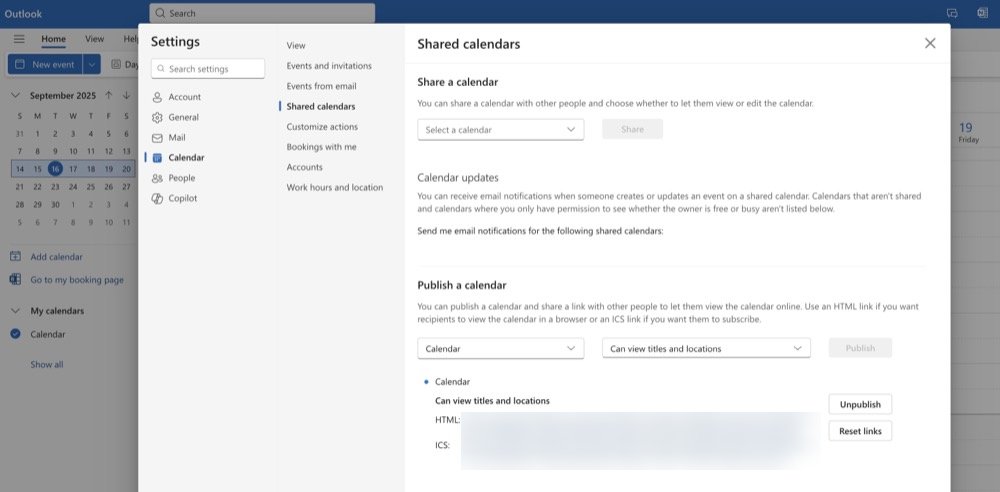
- Go to Calendar → Settings (gear icon) → Shared calendars
- Under Publish a calendar, click Publish this calendar
- Choose Can view titles and locations
- Copy the ICS link
- Paste the URL into Planneriffic, give it a name and choose a color
Apple Calendar
Method 1: iCloud
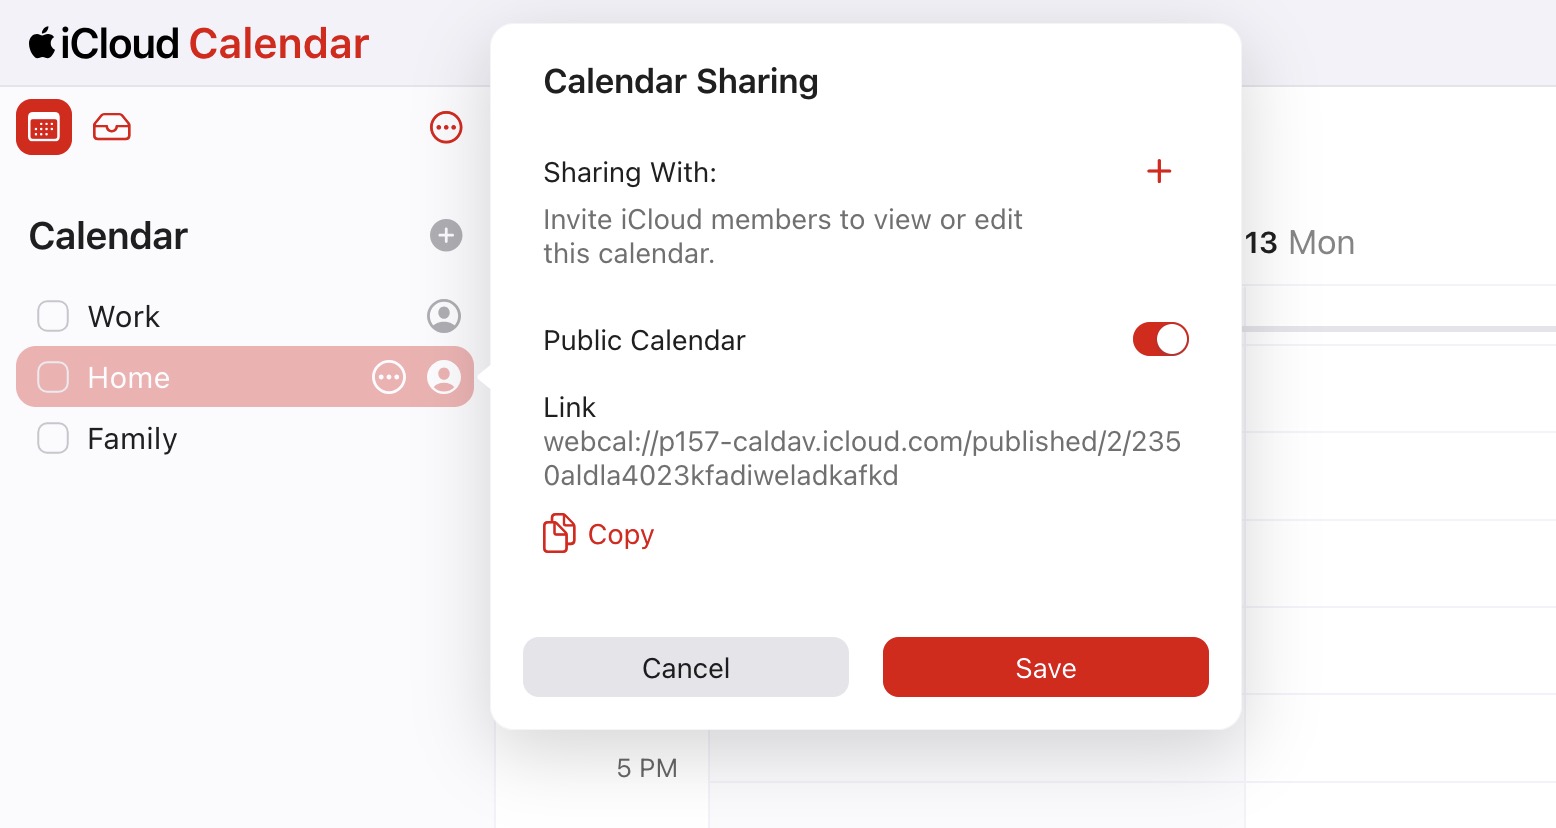
- Open iCloud.com → Calendar
- Click the share icon next to the calendar you want
- Toggle Public Calendar and copy the link
- Paste the URL into Planneriffic, give it a name and choose a color
Method 2: Mac Calendar App
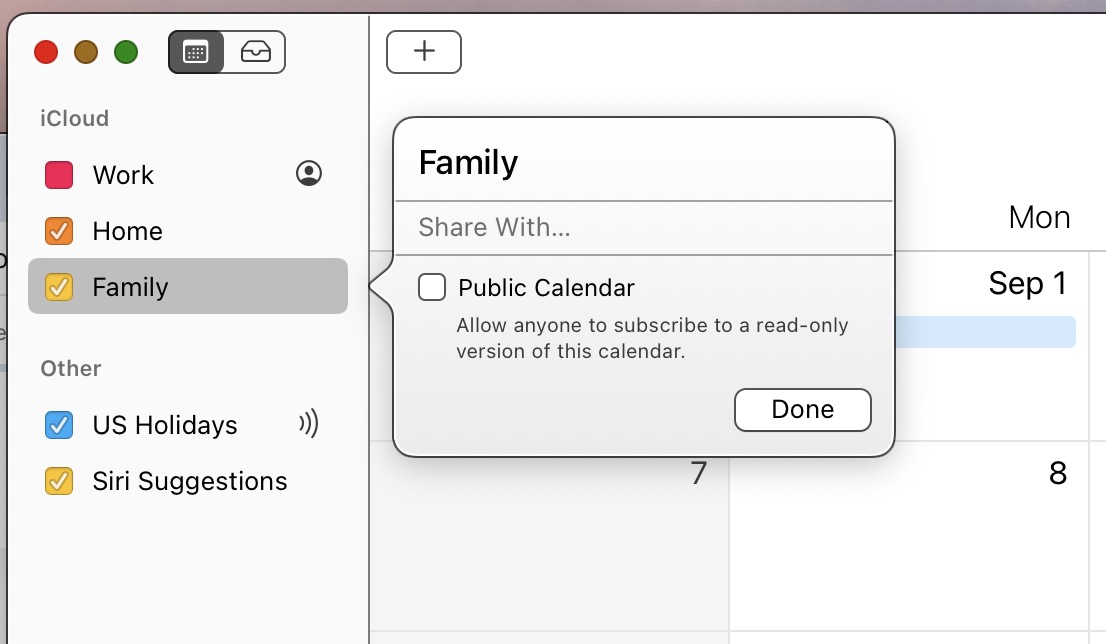
- Open Calendar on your Mac
- Click the share icon next to the calendar you want
- Toggle Public Calendar and copy the link
- Paste into Planneriffic, give it a name and choose a color
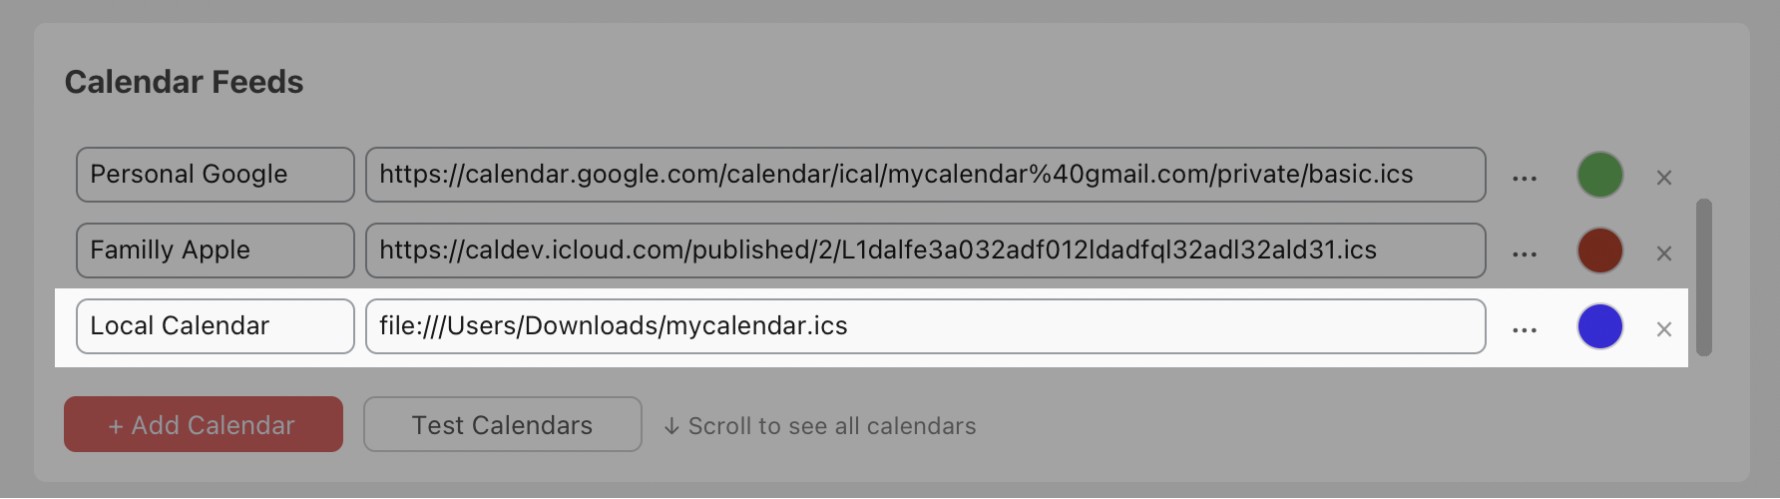
Local .ics Files
- Click Add Calendar → Import Local File
- Browse to your
.icsfile, choose a name and color
Planneriffic will re-read this file each sync, so export your calendar to the same path when updating.
Tip: Useful for calendars that can't be accessed via URL, or for offline use.
How to Export .ics Files
Refer to your calendar app's documentation for export instructions. You can also automate exports with scripts and point Planneriffic to the file.
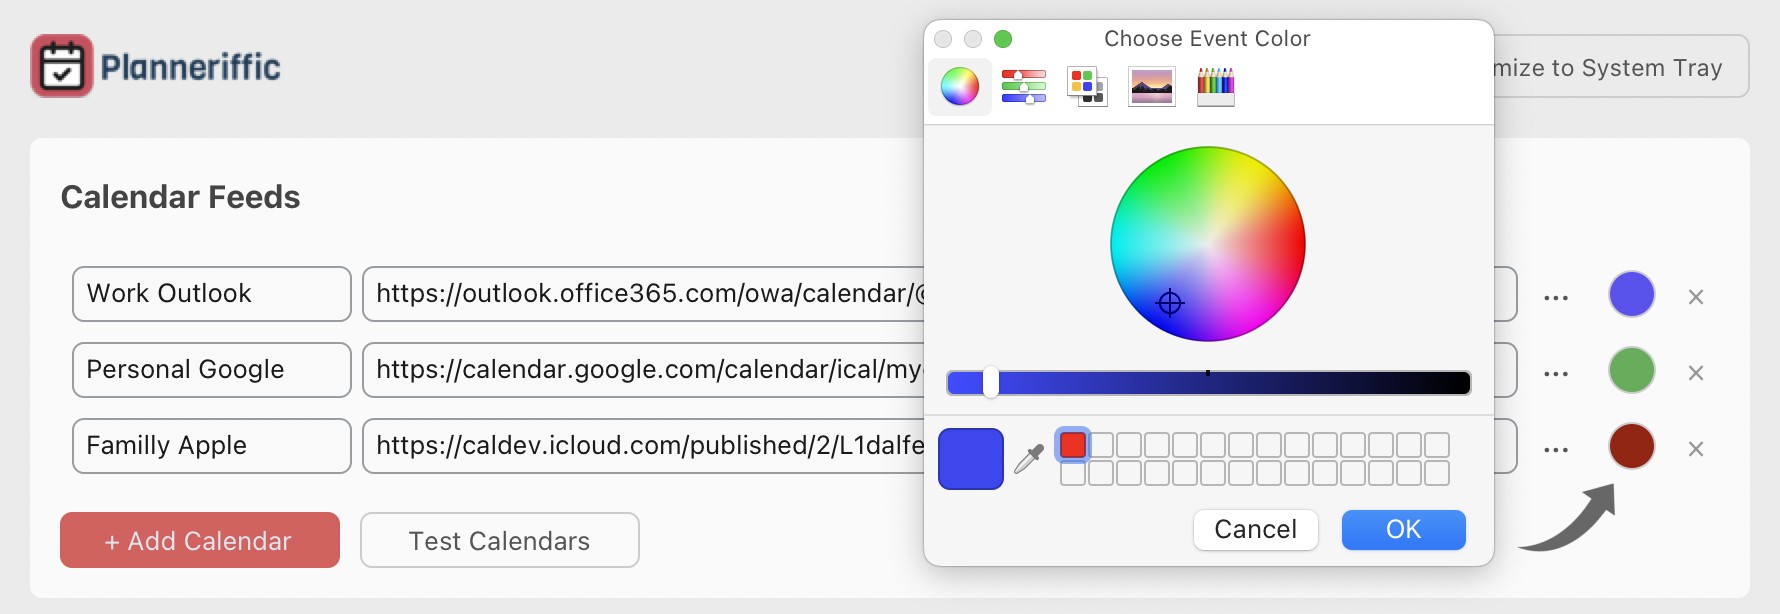
Multiple Calendars and Colors
Click Add Calendar to add more feeds. Use different colors for each calendar to differentiate events in your planner.
Test Your Calendars
Click Test Calendars to verify your URLs are working. Results appear in the Activity Log.
Configure Your Settings
Customize your planner. Have a suggestion? Let us know.
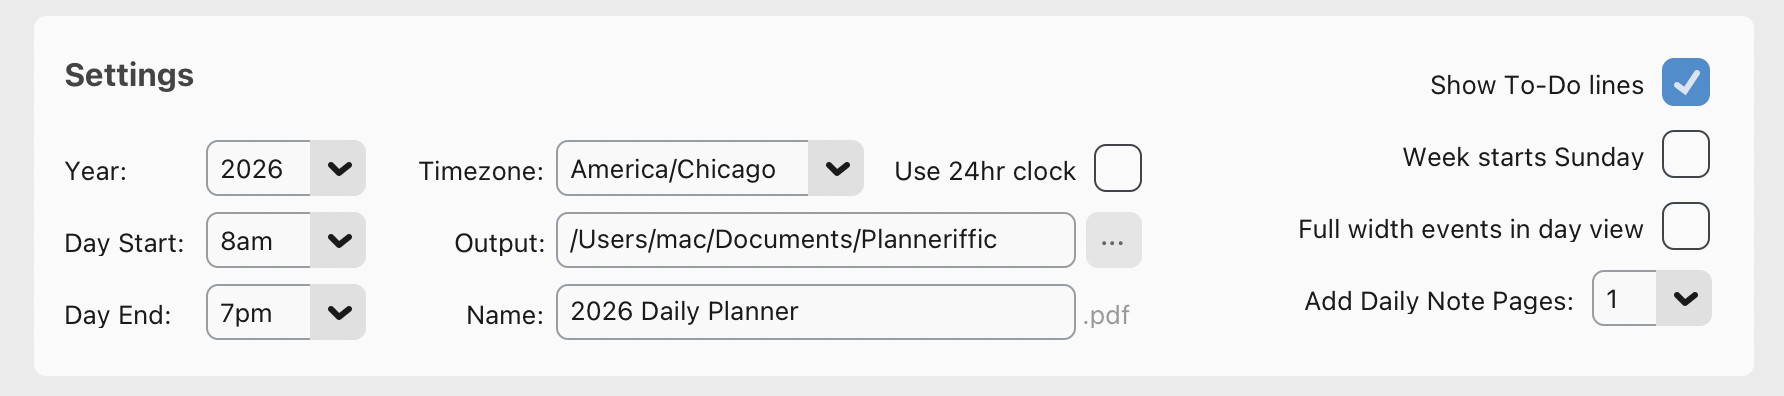
- Calendar Year — Select the current year or a future year.
- Day Start / End Times — Set the time range for daily pages (up to 12 hours).
- Timezone — Auto-detected. Override manually if needed.
- Output Folder — Where to save your PDF. Filename must match what's on your Move for sync to work.
- Daily Note Pages — Add 0–5 blank note pages after each day. Each has a "D" link back to that day.
- To-Do Boxes/Lines — Adds checkboxes and lines on each day page.
- Week Start — Choose Sunday or Monday.
- 24hr Clock — Switches all time displays to 24-hour format.
- Full Width Events — By default events use 50% width so you can write notes beside them. Enable this for full-width when there's no overlap.
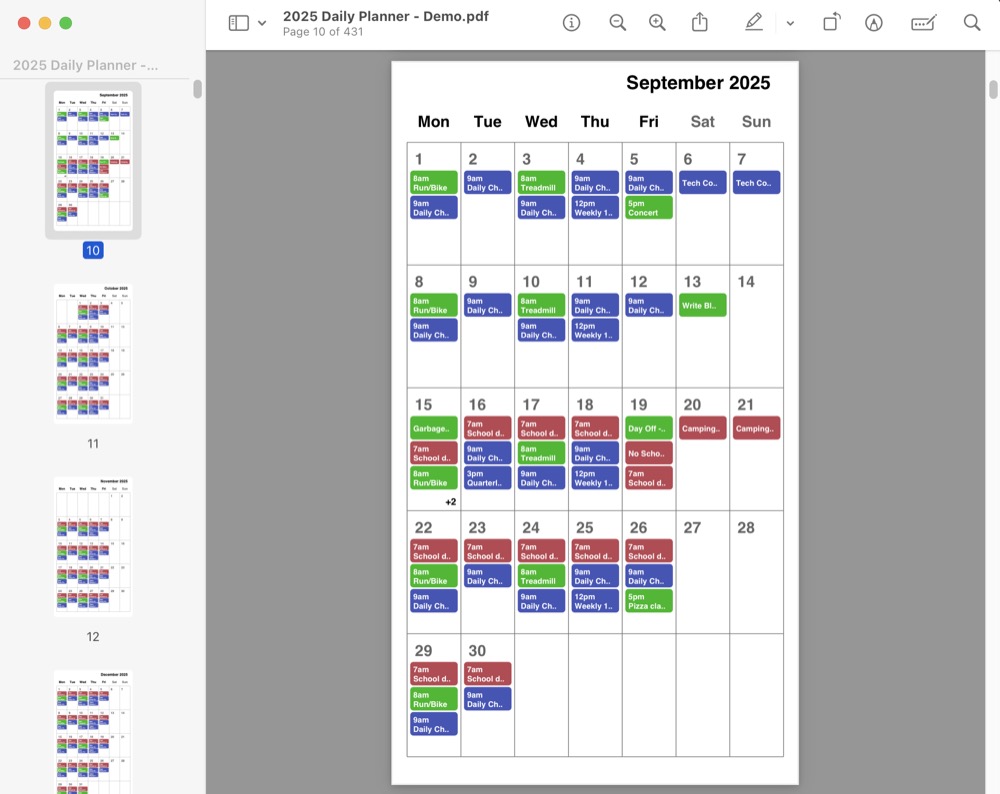
Generate Your Planner
Click Generate Planner to create your PDF. Review the views and layouts, then proceed to Auto Sync below.
Auto Sync Setup

Planneriffic auto-syncs whenever you connect your Move via USB. Pick a sync mode — Developer Mode is recommended because it preserves your handwritten notes between syncs.
Non-Developer Mode
Best for: Simple setup, no Developer Mode required.
How it works: Uploads a fresh PDF each time you connect via USB.
Setup Instructions - Non-Developer Mode
1. Enable USB Storage on your Move
Go to Settings → Storage → toggle on USB web interface.
2. Configure Planneriffic
Select Auto-sync when USB connected.
3. Test It
- Connect your Move via USB
- Planneriffic will automatically refresh your calendars, generate a new PDF, and upload it
- Check your Move — the planner should appear in your documents
Done! From now on, just plug in your Move and Planneriffic handles the rest.
Developer Mode (Preserves Notes)
Best for: Keeping your handwritten notes intact between syncs.
How it works: Connects via SSH to update calendar data while preserving your notes, highlights, and annotations.
Setup Instructions - Developer Mode
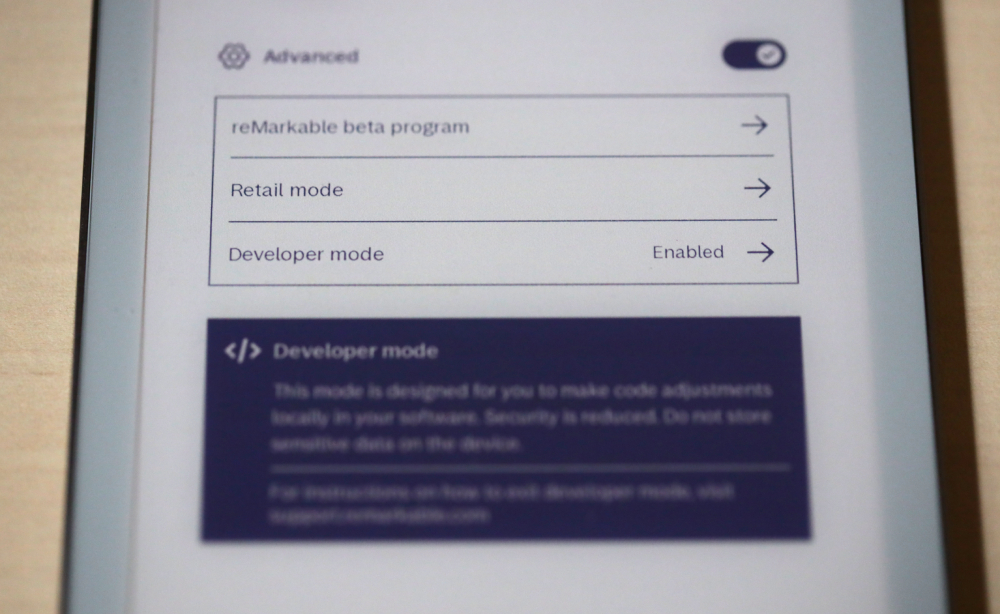
1. Enable Developer Mode on your Move
- Go to Settings → Software
- Scroll down and tap Developer Mode
- Read the warnings and tap Enable
- Your Move will reboot
Important: This may void your warranty and factory-resets your device. Make sure your files are cloud-synced before enabling.
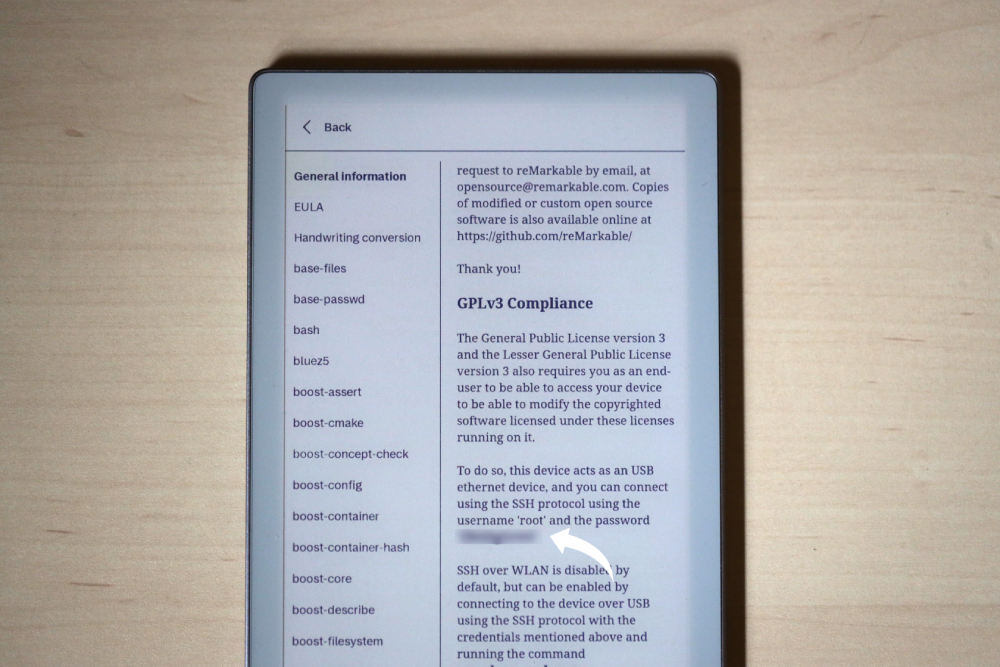
2. Get Your SSH Password
- Go to Settings → Help → Copyrights and licenses
- Under General Information, scroll to GPLv3 Compliance
- Your SSH password is displayed in bold — write it down
3. Configure Planneriffic
Select Auto-sync when USB connected and enter your SSH password.
4. Test It
- Connect your Move via USB
- Planneriffic will refresh calendars and update the PDF while keeping your notes
- Your Move will restart with the updated planner
Done! Calendar events stay current, handwritten notes stay intact.
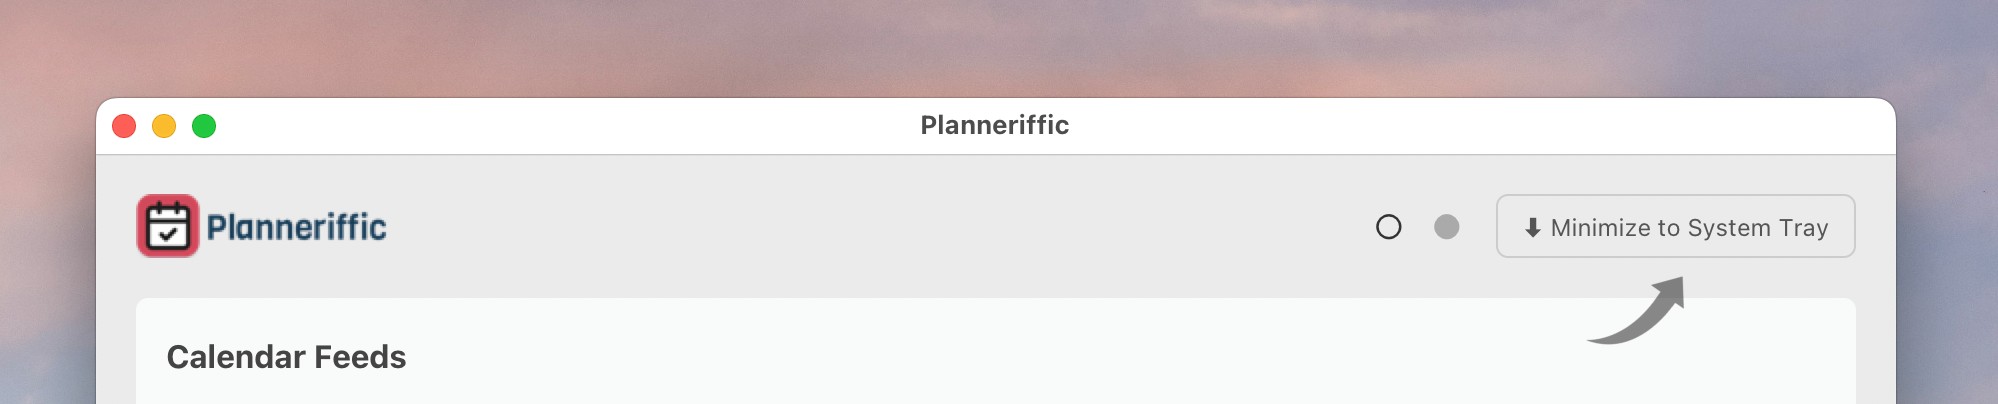
Minimize to System Tray
Click Minimize to Tray to run Planneriffic in the background. It will auto-sync whenever you plug in your Move.
You'll see status icons in the tray: a calendar icon when idle, a sync icon during transfer, and a checkmark on success.
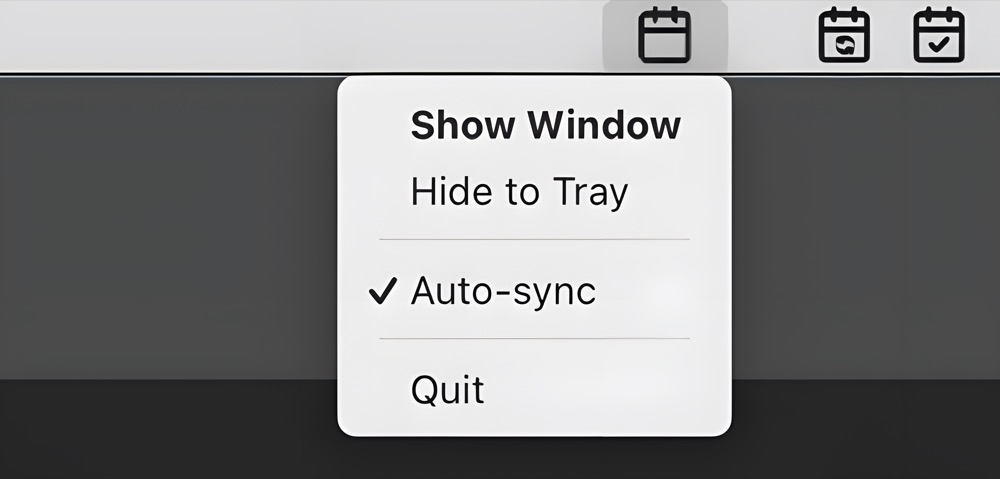
Tip: Enable Show Sync Success Message in the app to get a notification popup after each sync.
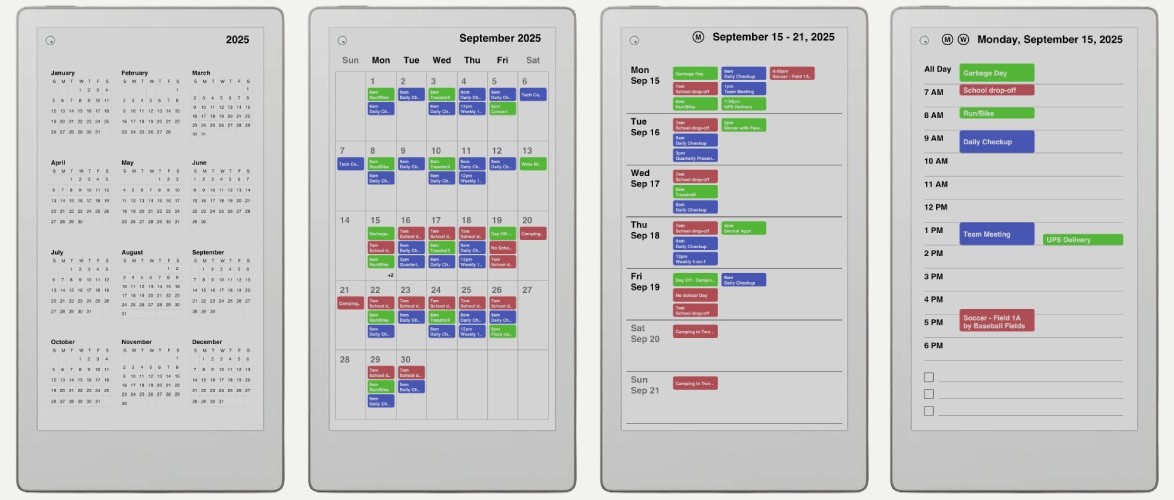
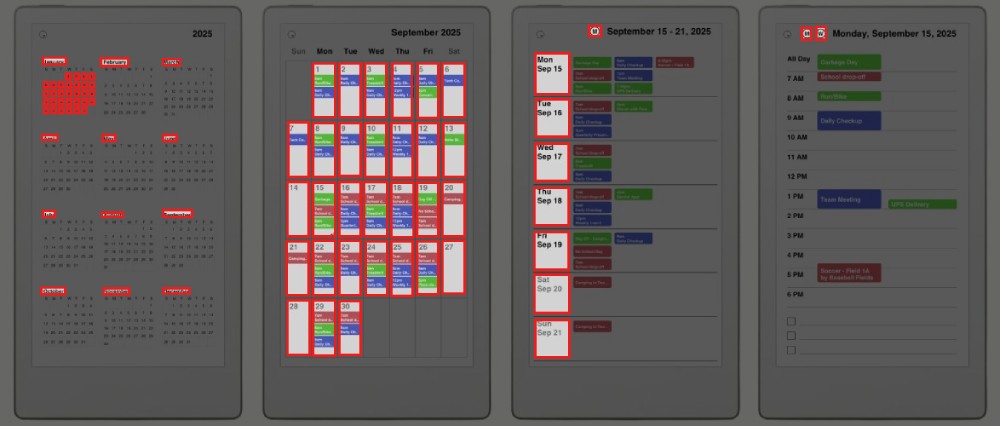
Navigation Links
Use your finger (not the marker) to tap navigation links in the planner.
- Year View — Tap any month name or day box to jump there.
- Month View — Tap a day to jump to it. Tap Y for year view.
- Week View — Tap a day on the left to jump to it. Use M or Y at the top.
- Day View — Tap Y, M, or W at the top to navigate.
- Note Pages — Tap D to return to that day, or use Y, M, W.
Questions or Need Help?
Reach out via the contact page or check the FAQ.
Happy planning! 📅