How the Planneriffic app was made
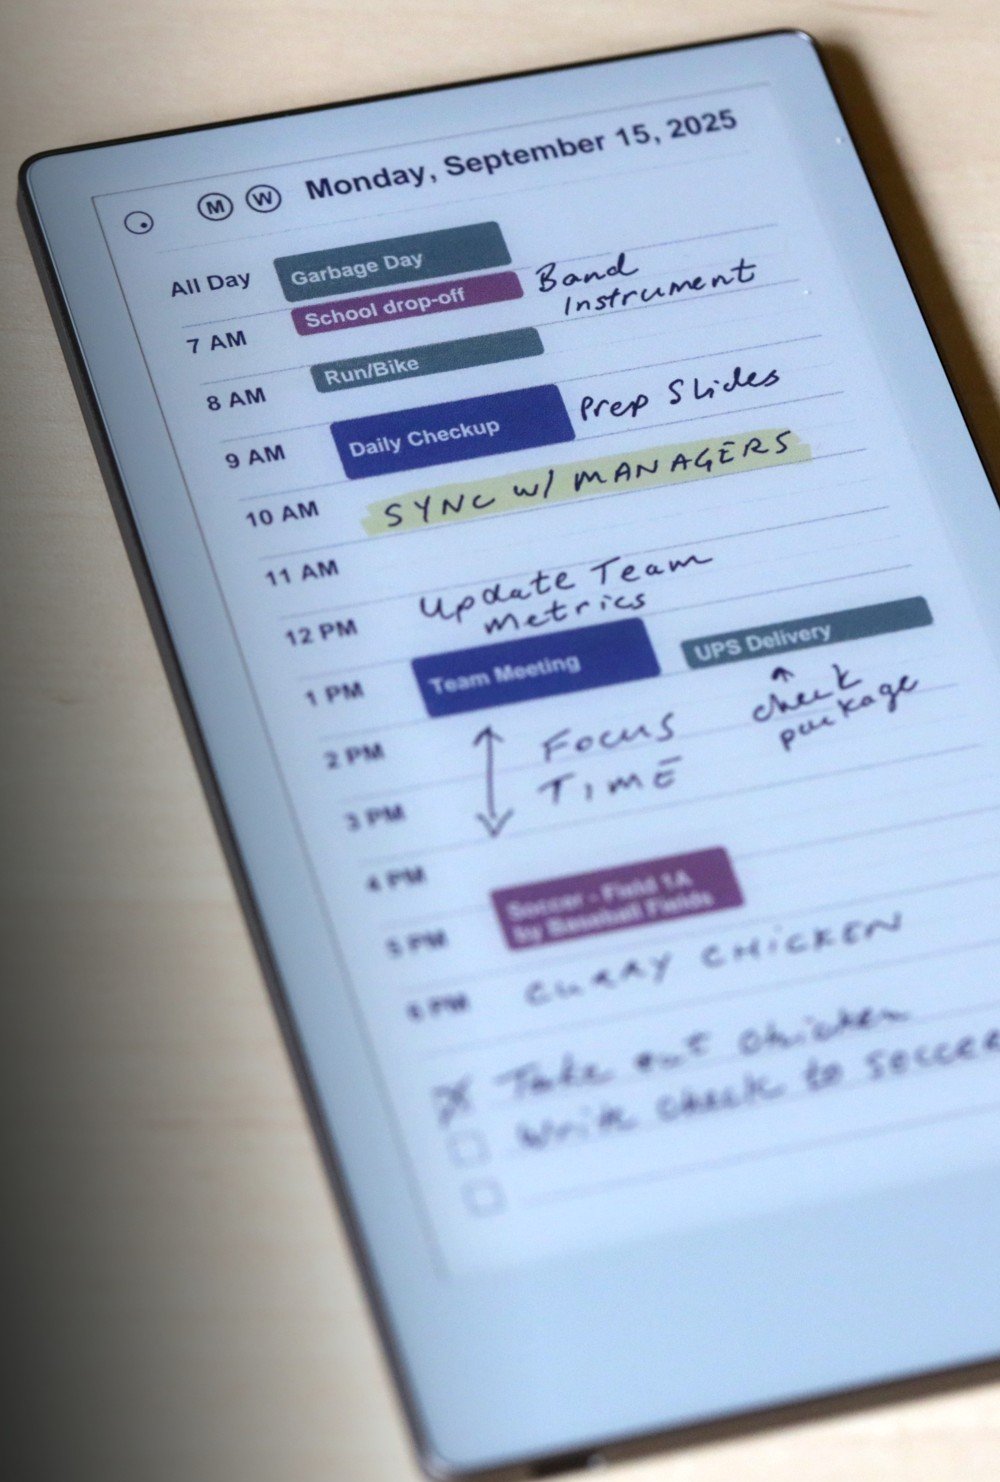
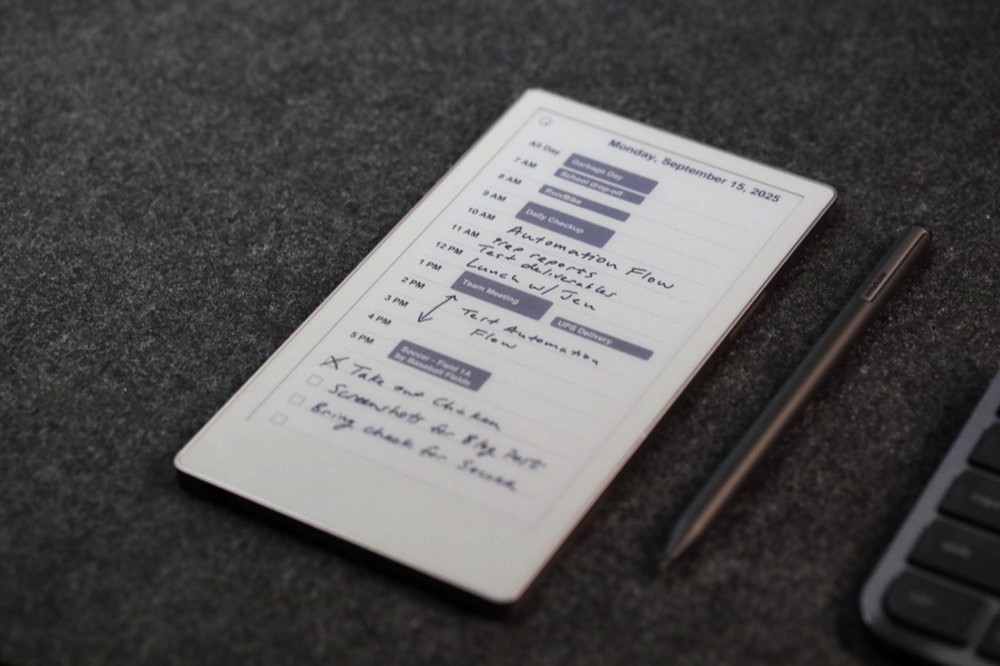
The Planneriffic app was born out of a personal desire to sync my calendars with my reMarkable Paper Pro Move. I wanted a simple daily planner that already had my events on it - so I didn't have to fill out a blank template every day. And then I wanted to be able to write on it. Simple enough, right?
It turns out, that's something that others wanted too. Here's a brief story of how the app was made.
My Background
In my day job I'm a Product Owner, which means I help lead the development of software and web apps. My job is to understand what users want, and then work with developers to build it.
For personal projects, I enjoy tinkering with code and building small apps that solve my own problems. Often they are locally run web apps that are never deployed anywhere, or packaged desktop apps that I can run on my own computer.
So for me, I had the skills to design and build something that I and maybe others would find useful, but deploying a personal project to the world was a new challenge.
The MVP
The first version of this tool was a local web app made with Python and Flask. It grabbed calendar data from a publicly accessible URL, formatted it into a PDF, and then I would manually copy it to my reMarkable Move.

It worked well enough for me, so I wanted to share it with other Move owners. There are a ton of PDF templates out there for ReMarkable devices, including the Paper Pro Move, but there wasn't a calendar sync solution for the Move yet. To me that was essential because I didn't want to fill out my blank planner every day.
While it's easy to share a Github repo link for a local app like this, most people don't know how to run local code and I wouldn't expect them to. So I first deployed it to a free tier on Render, a cloud hosting service for web apps. It worked, but because it's free there are downsides, like the app going to sleep after 15 minutes of inactivity. Whenever someone would visit the site, it would take a minute to wake up and load.
So then I deployed it to PythonAnywhere, which also has a free tier but doesn't go to sleep. It took a bit more effort to set up than Render, and I had to create a separate version of the app than my local version, but that's ok.
I removed all logging and debugging code, so that there was absolutely no chance of anyone's calendar URLs being logged. Privacy is important when it comes to calendar events, so I wanted to make sure it was clear that I wasn't storing or logging any personal data.
Then I wrote up a long blog post on my personal site about this little tool (ReMarkable Move Daily Planner Generator with Calendar Events), and I shared it on Reddit. I was thrilled that so many people found it useful, and I got a lot of amazing feedback and feature requests.
It was clear that other ReMarkable Move owners wanted to sync their calendars too, and they wanted a more seamless experience rather than manually generating and downloading a PDF every day. So I started thinking about how to make that happen.
The Feature Requirements
Here's what I learned from user feedback about what features were most important:
- Automatic Syncing: Users wanted the app to run in the background and automatically sync their calendars in some way. No manual steps.
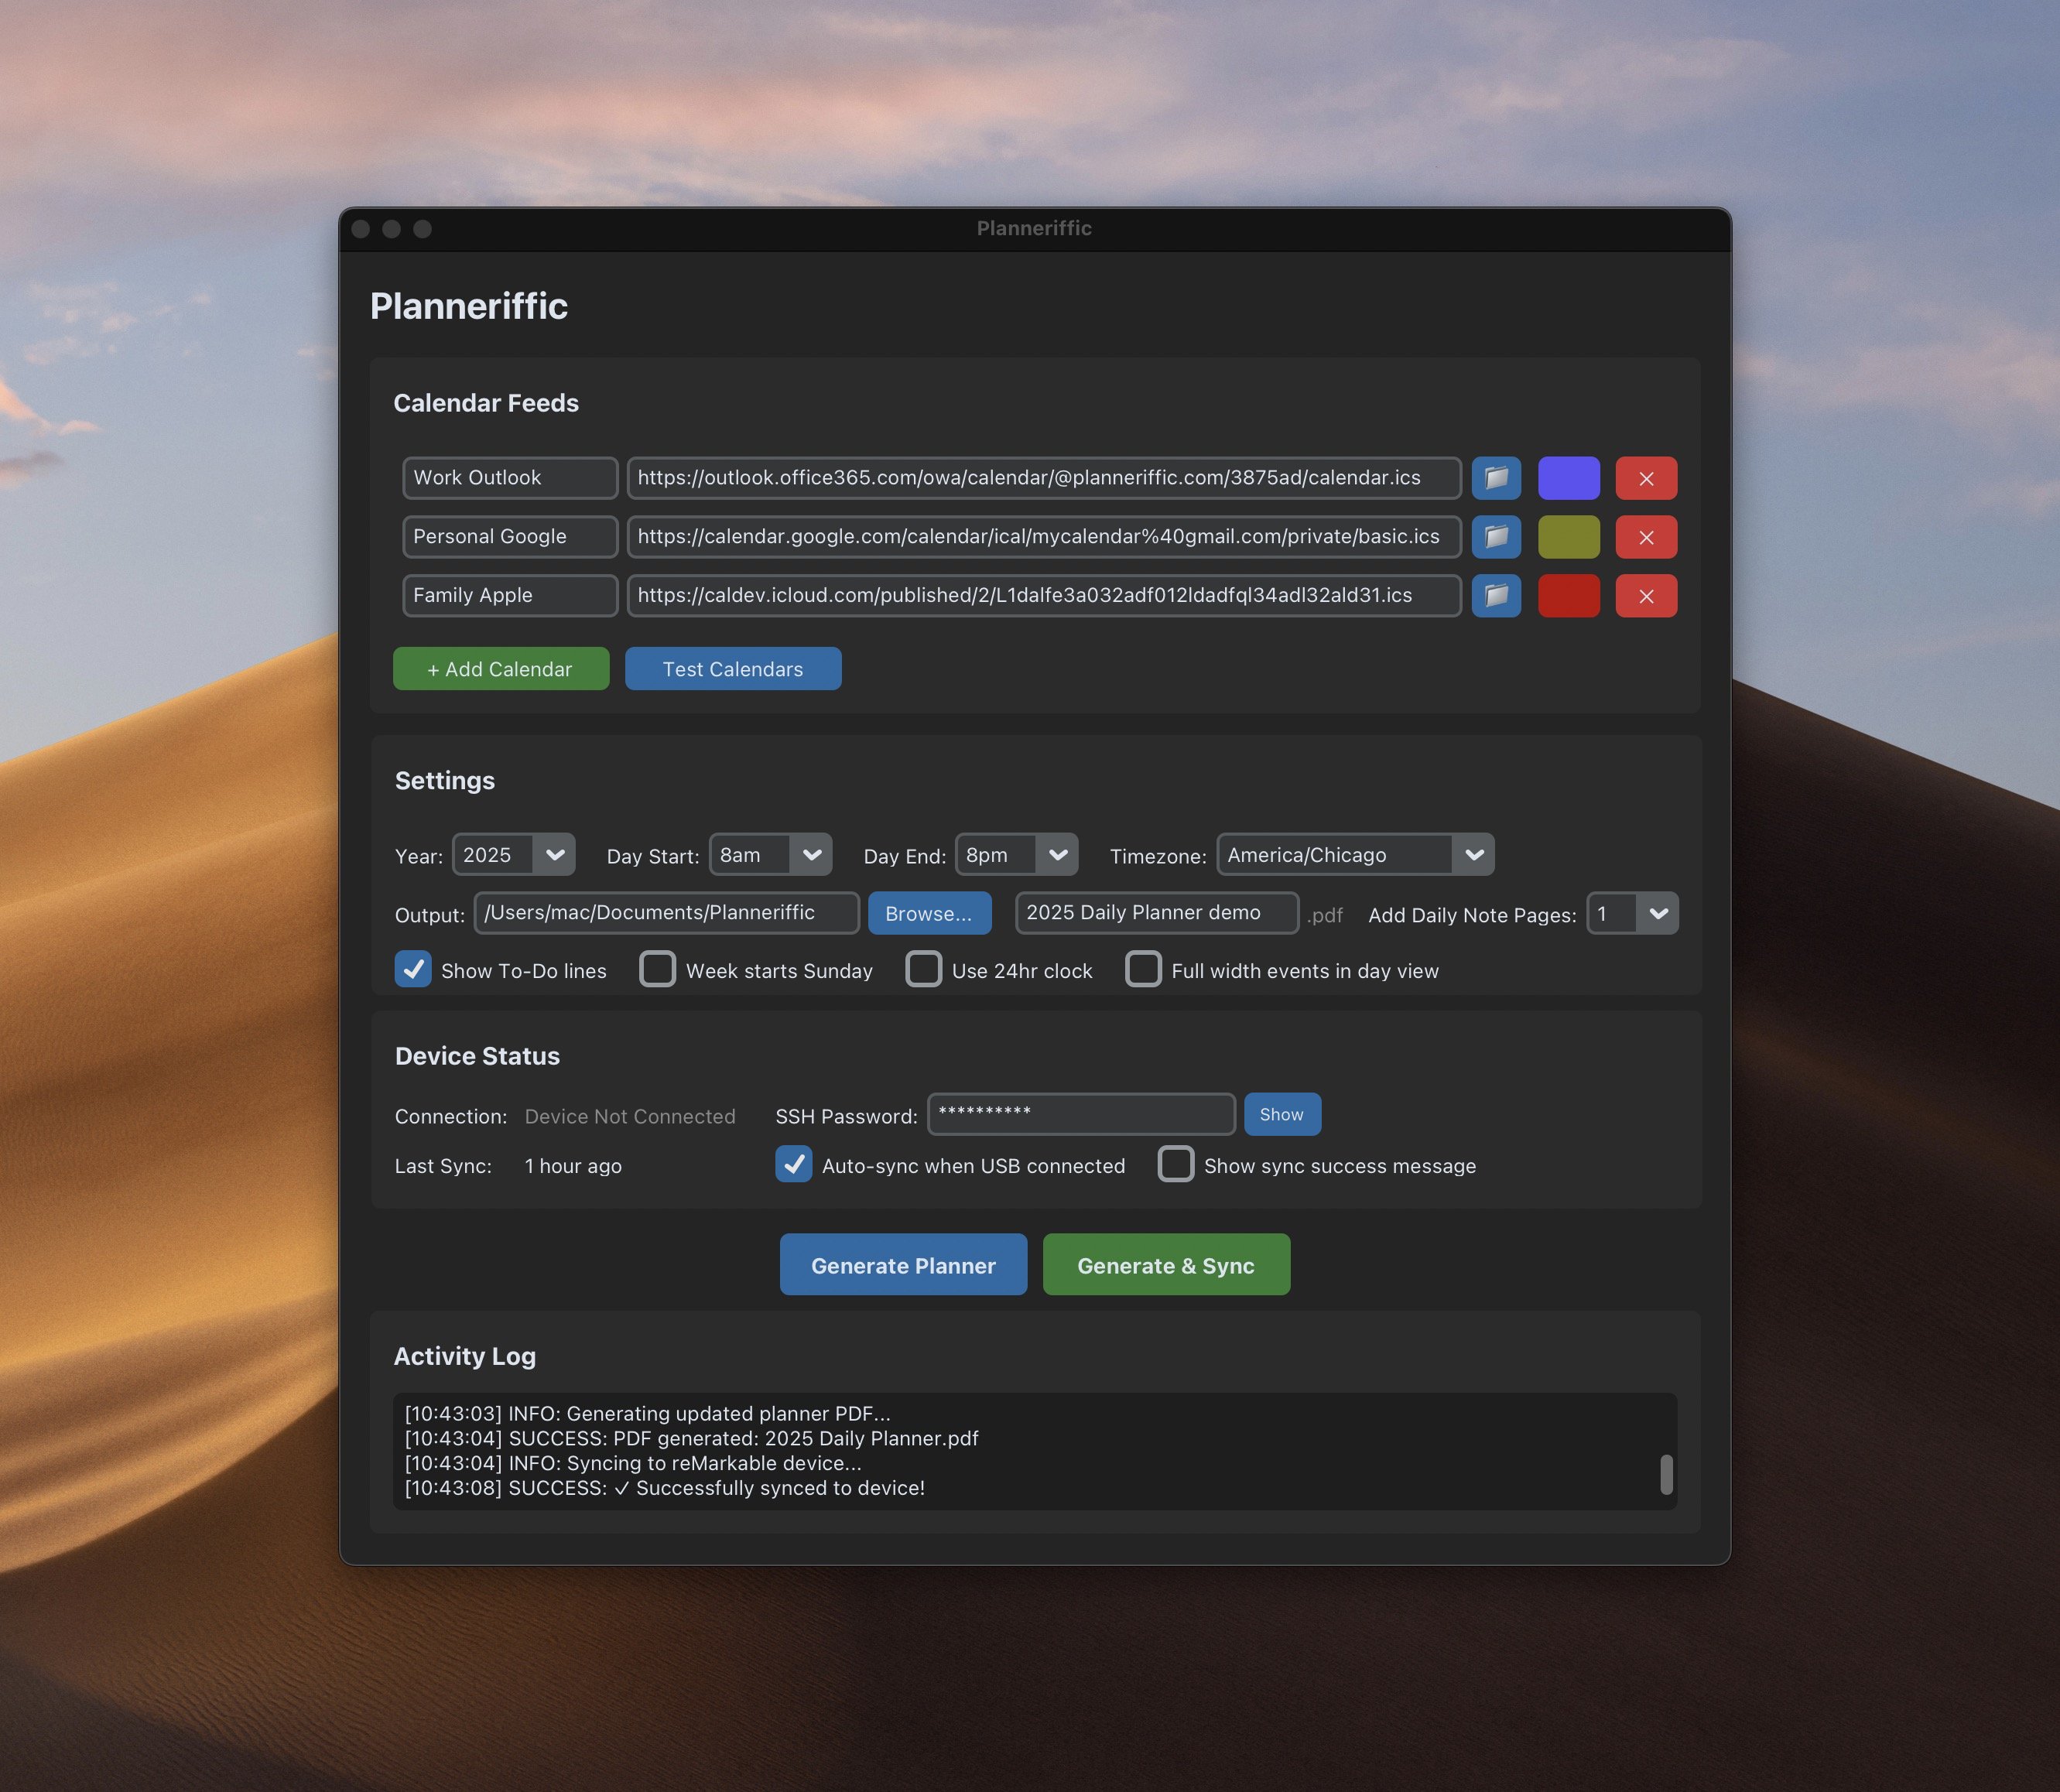
- Multiple Calendars: Many users have multiple calendar feeds (work, personal, family) and wanted to see all of them on their planner. It needed to support Google, Outlook, iCloud, and local .ics files.
- Cross-Platform: Users wanted the app to run on both Windows and Mac. As much as I love Mac, I know many people use their ReMarkable at work, where Windows is more common.
- Easy Setup: The app needed to be easy to install and configure, with options such as 12 or 24 hour time, week starting on Sunday or Monday, auto timezone detection with override, and more.
- Privacy: Users wanted to know that their calendar data was private and not being sent anywhere. The app should run locally on their machine and not store any data in the cloud.
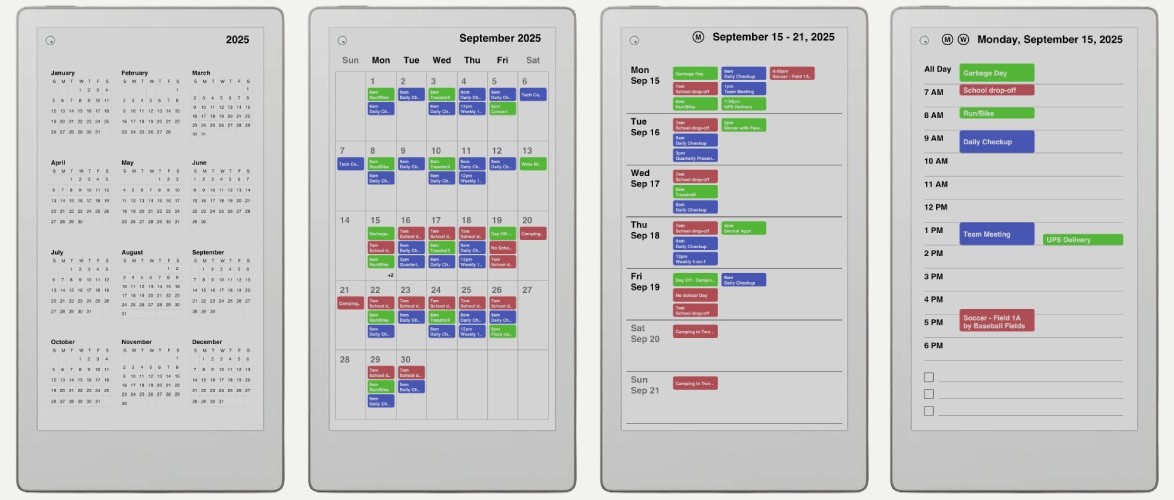
- Monthly, Weekly, Daily Views: Although the daily view is the end goal, users also wanted weekly and monthly views for planning ahead. Interactive links to switch views would be nice.
Why a Desktop App?
The most essential part of this project is the auto sync, and unfortunately there's no way for a web app to connect to a ReMarkable user account via APIs. Maybe there is for a big partner company, but not for a little app like this.
I've built some web browsing automation tools before, so theoretically a web app could trigger an automation script that logged into a person's ReMarkable account, deleted the old planner PDF, and uploaded the new one. But that wasn't a sustainable solution.
So early on I decided that a desktop app was the only logical solution. Plus, I prefer local apps that don't require maintaining databases, user authentication, and so on. It's just cleaner and more secure, and doesn't have ongoing costs. And all the data is stored locally in a simple config file.
The Tech Stack
Since the original web app was built with Python, I wanted to stick with that language for the desktop app. Python has great libraries for working with local files, generating PDFs, and more.
For the UI, I chose to use the oldie but goodie Tkinter UI library. It looks like it's from the 1990s, but it's super lightweight and works in both Windows and Mac environments. I've experimented with Electron apps before, which are basically web apps wrapped in a desktop window, but that would be overkill for this simple tool.
And for the syncing functionality, I explored some Github repos that provided insight into how to connect to a ReMarkable device via USB, for both users who have Developer Mode enabled and those who don't. This was the trickest part of the project, but I was able to piece together a solution that works well.
Developer Mode vs Non-Developer Mode
One of my core beliefs is that software should be easy for non-technical users, even it means it's harder to build. But sometimes you can only do so much.
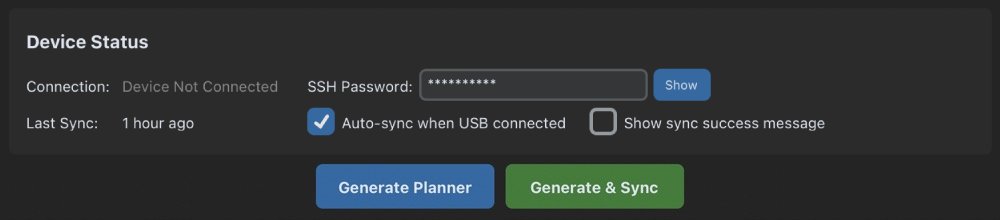
In the case of syncing a Planneriffic PDF with a ReMarkable Move, there are two ways to do it: with Developer Mode disabled (the default state for the device), in your Move Settings -> Storage you can Enable USB web interface, which will automatically upload a new PDF whenever you connect the Move via USB.
With the USB web interface enabled, you don't need to do anything else like go into your browser. Planneriffic handles the file upload on sync.
That's an easy win for most users, especially if you don't need to update your calendars very often. But the downside is that there's no way to automatically delete the old PDF from the device, and it also doesn't sync any handwritten notes from the planner PDF back to the computer.
Developer Mode
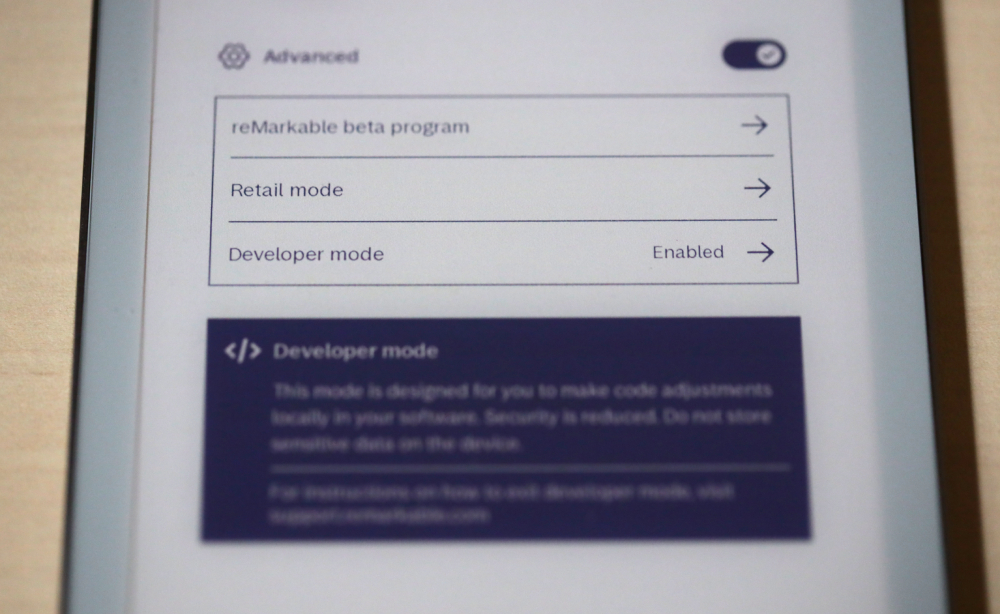
Developer Mode is required for Planneriffic to do a full sync, which automatically replaces the old PDF with the new one, and also syncs any handwritten notes. But to enable Developer Mode requires a factory reset, which means all folders and files will be deleted. Thankfully I found that if files are backed up to the ReMarkable cloud, then after the factory reset they are restored automatically to the Move.
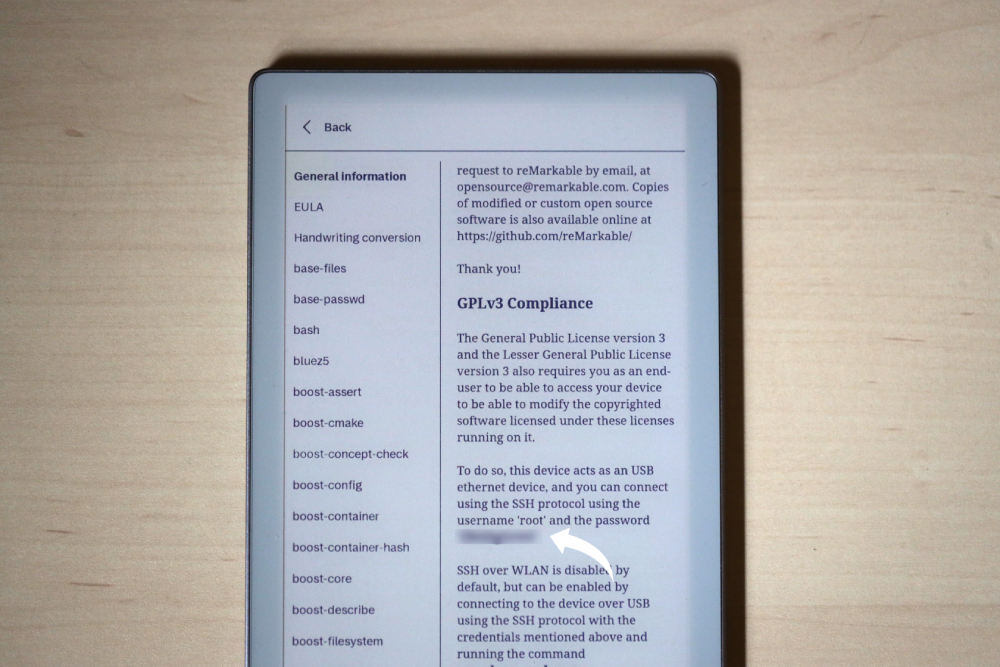
The last part of requiring Developer Mode for auto-sync is looking up a unique SSH password on the device, which is under Settings -> Help -> Copyrights and Licenses, down a little ways under the first tab called "General Information."
So all told I don't think it's that difficult to enable Developer Mode for auto-sync with Planneriffic, but I do understand that some users may be hesitant to do it. There is more information on Developer Mode on this ReMarkable Support page.
Beta Testing with Real Users
Once I had a working prototype of a Mac app, I reached out to some of the users who had given me feedback on the web app. I asked if they would be willing to beta test the desktop app and provide feedback.
They were incredibly generous with their time and insights. They helped me identify bugs, suggest improvements, and refine the user experience. It's easy to assume how a user might interact with an app, but real user testing is invaluable.
If you are a Planneriffic user and have ideas for improvements, please reach out via this contact form!
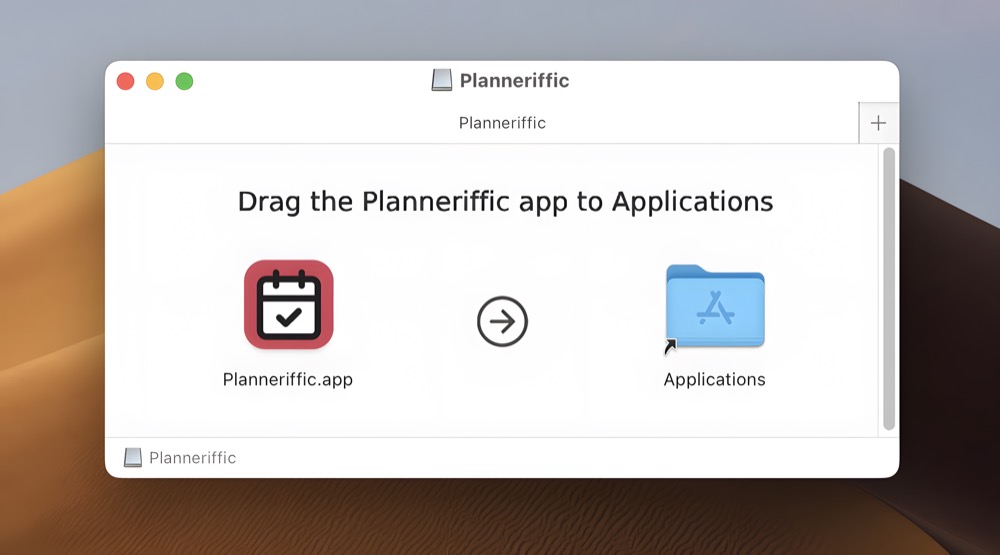
Making the Website and How-To Guide
Fortunately I have already built lots of websites, so creating this site using my favorite tech stack was pure joy. Before software I worked in marketing and creative, so I really enjoyed putting the screenshots, photos, and copy together for the installation guide, the homepage, and so on.
I chose the Planneriffic name and domain because it felt lighthearted yet outstanding, in a similar way that "Remarkable" feels. Like Terrific, but for planners. And then I got the email address set up, web hosting, the app icons, all the fun stuff.
The last part was the Stripe integration for payments, which was a breeze since I already had experience selling some digital products, along with maintaining an LLC, handling the email automation for download links, and some basic workflows.
I thought that was it, but then when I tested the entire UX from a customer's perspective, I realized I was missing a crucial step: signing the app for both Mac and Windows. Turns out this part was really hard!
Packaging and Signing the App
If you've ever downloaded a Mac app from the internet, you may have seen a warning that says "unidentified developer" or "app can't be opened because it is from an unidentified developer," or other similar messages. This is because Apple requires apps to be signed with a developer certificate to ensure they are safe to run.

To get a developer certificate in order to sign the Mac app required enrolling in a program, paying an annual fee, going through identity verification and submitting business documents. But the arduous part was setting up the code signing - it took a lot of trial and error before it finally worked.
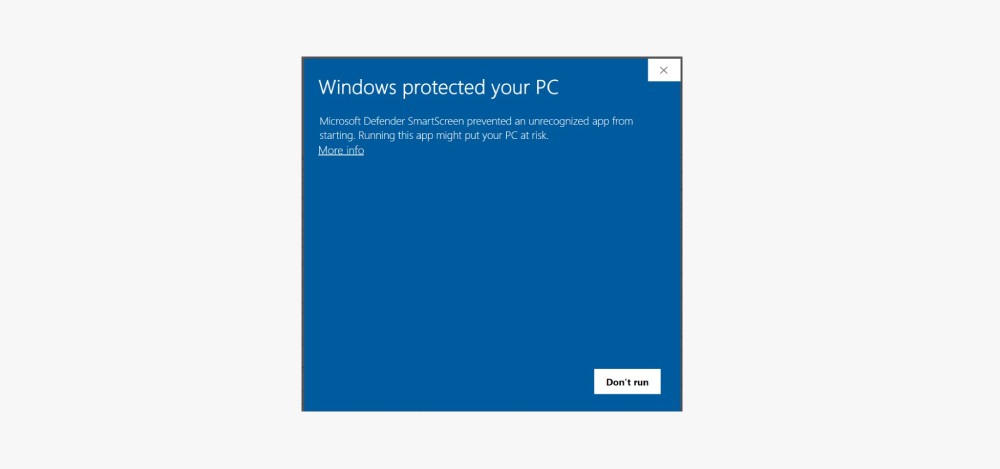
But if I thought the Apple process was hard, signing the Windows .exe app was a doozy. Navigating the 50-step process through Azure Trusted Signing was an intense exercise in patience, and I almost gave up. After all, I could just instruct users to get around the security warning. But it didn't feel right to do that.
So in the end I trudged through it, and now I can see the benefit of making the process so difficult for developers. Because it means an app that has made the effort to get verified and gone through the process is trustworthy. And I want users to trust the Planneriffic app.
The Final Product
After weeks of building in my late evenings and weekends, I was able to create a desktop app that meets my needs for daily planning on my ReMarkable Move, and hopefully it meets your needs as well. The app runs smoothly on both Windows and Mac, supports multiple calendar feeds, and prioritizes user privacy by storing all data locally.
I'm excited to see how users will benefit from this tool, and I'm grateful to everyone who contributed to its development.